Hello! Larisa here and today I'm so excited to share a few cards with you featuring the NEW RELEASE! All the new goodies are AVAILABLE NOW so hop over there and check them out. This month is packed full of fabulous products and I'm excited to say, the DIES ARE BACK! Trust me, you do not want to miss this! So, let's get started.
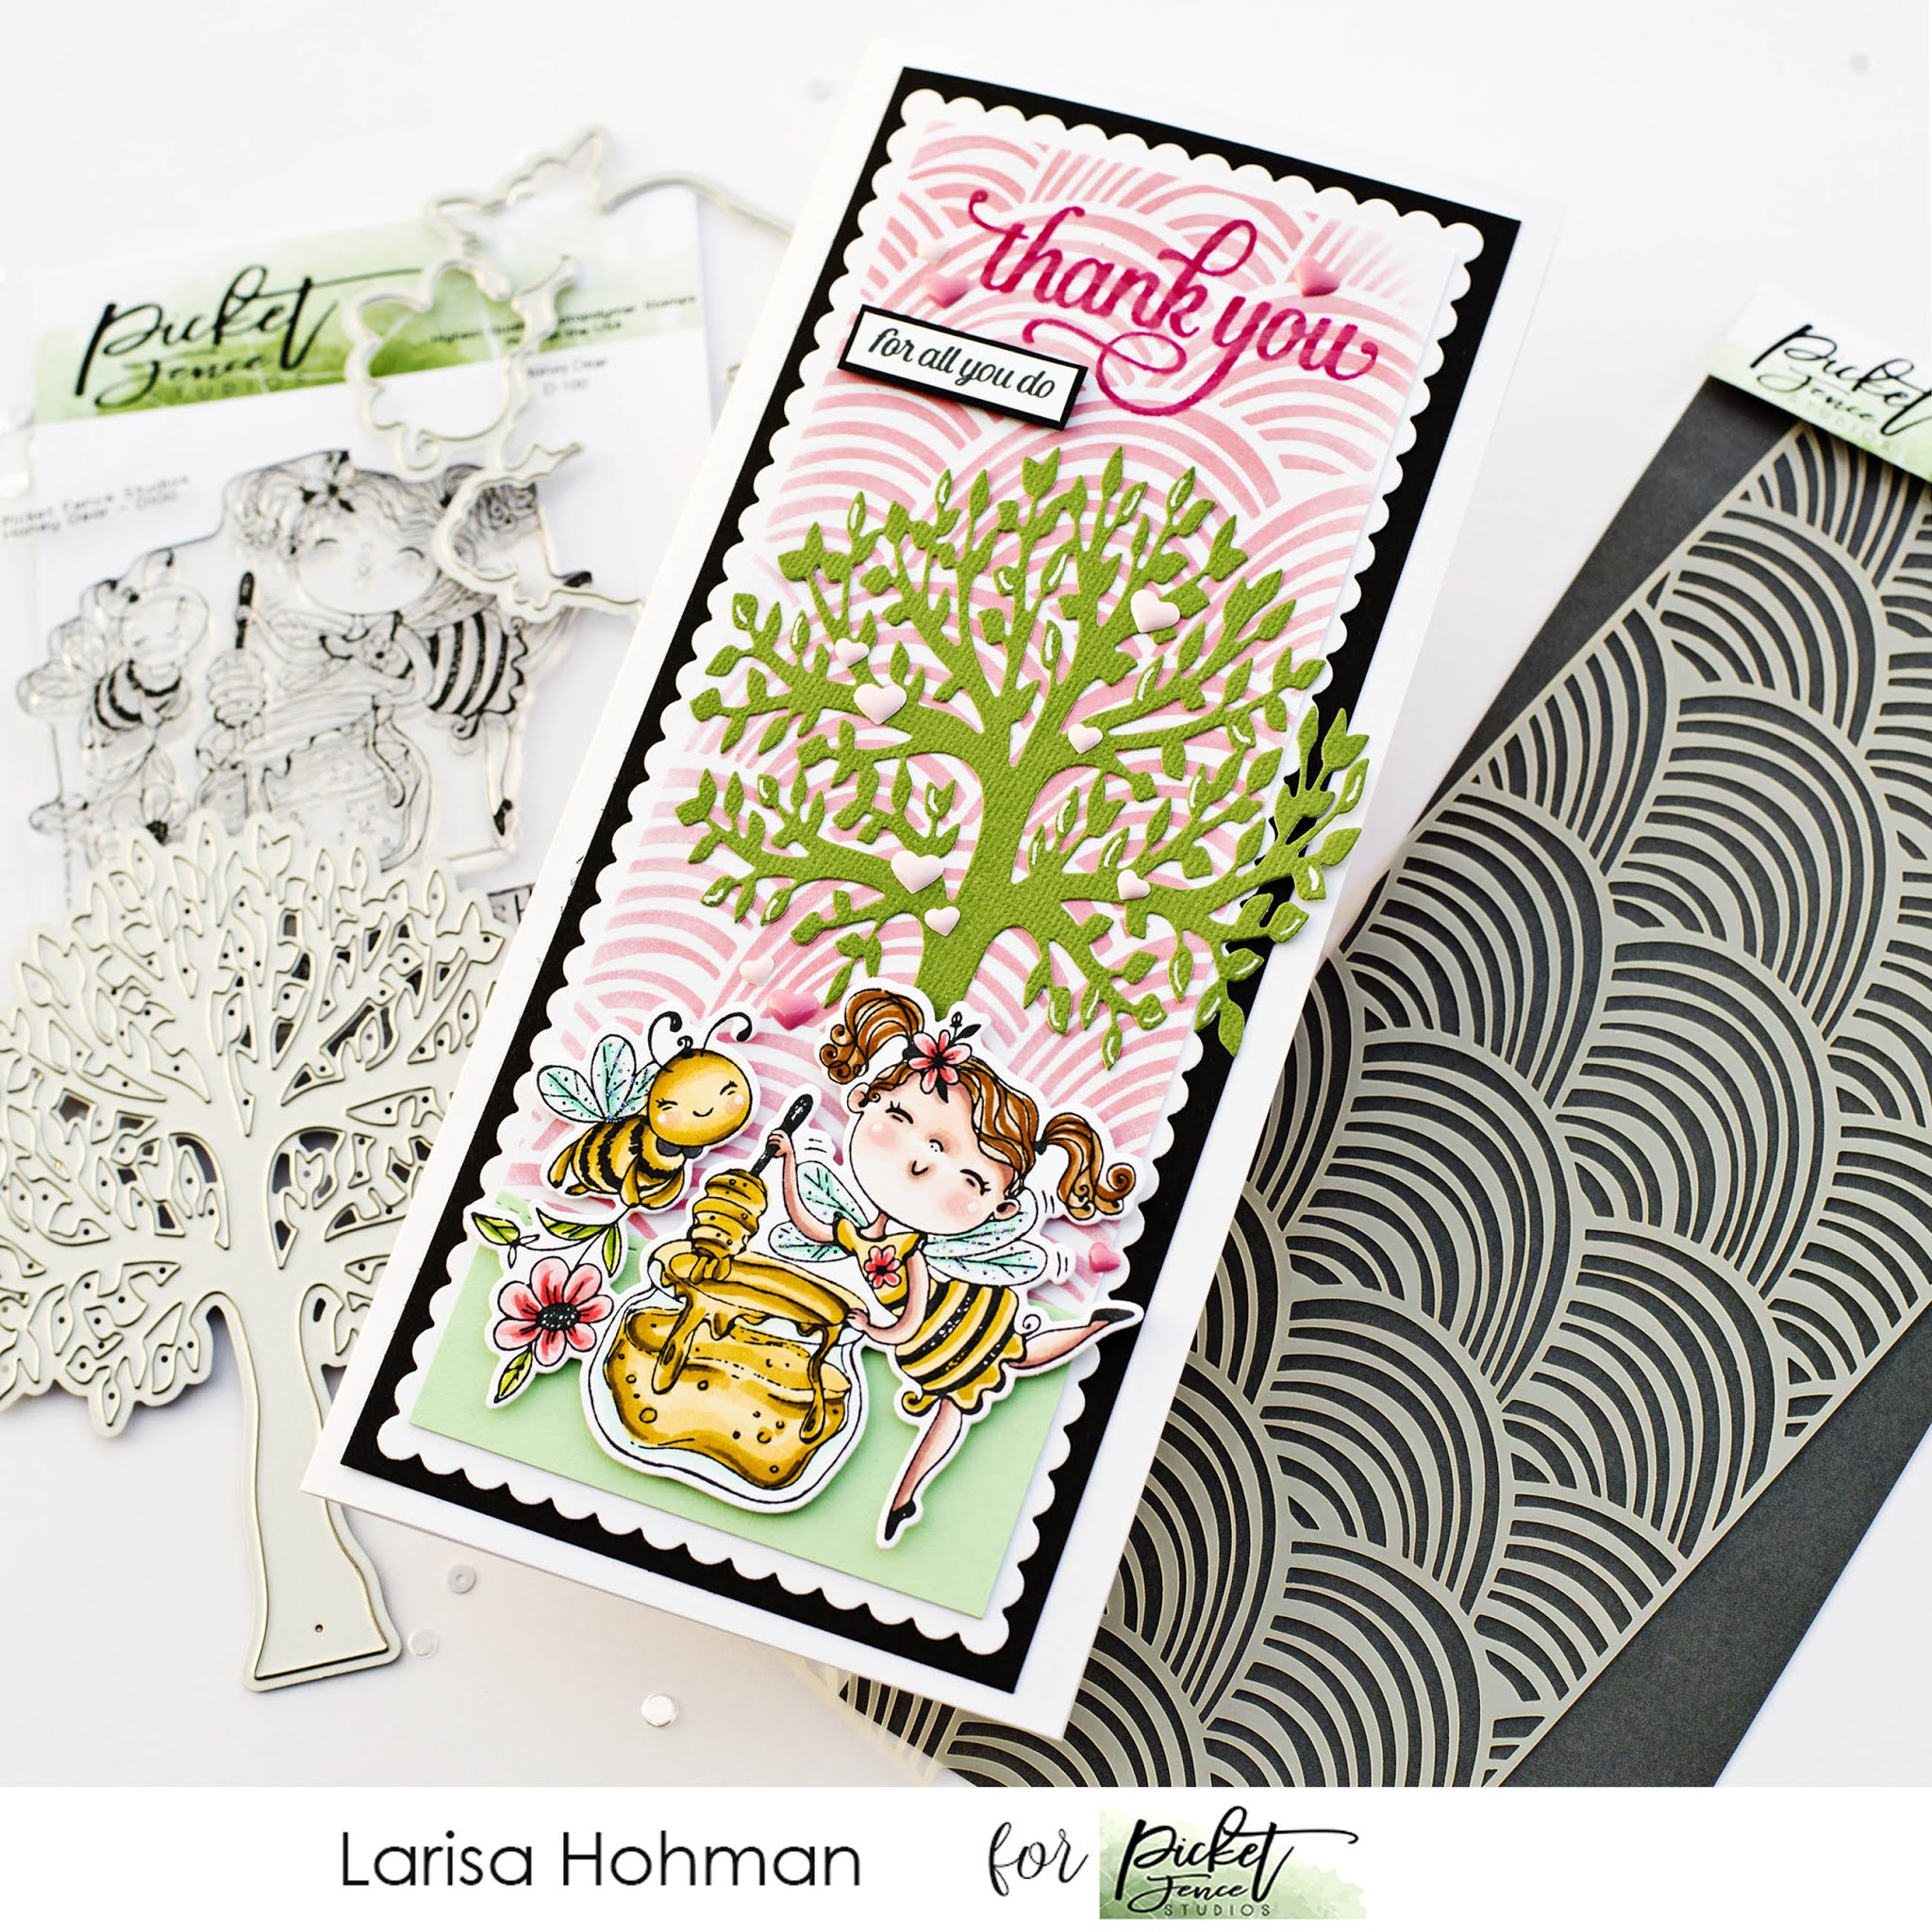
For my first card, I created a sweet slimline card featuring the NEW Slimline Rainbows Stencil. I used my Life-Changing Blender Brushes to ink it up with some Spun Sugar Distress Ink. I added a bit of green card stock to the bottom to simulate grass. Then I die cut my panel into a scalloped rectangle and adhered that to a piece of black card stock. I die cut the NEW A Tree Die from some green card stock and adhered that to the center of my panel. It's a little off center to add some interest. For my image, I stamped, colored, and die cut the NEW Honey Dear Clear Stamp Set. Isn't it just the cutest thing! I used foam tape with pop her on the bottom of my card. Then I worked on my sentiment. The NEW Thank You For Being You Clear Stamp Set is so versatile and I thought I would coordinate perfectly with this card. So, I stamped and embossed it at the top and added the little phrase just underneath popped up on some foam tape. A few enamel hearts, some Stickles Glitter, and white highlights using my gel pen finish this card off.

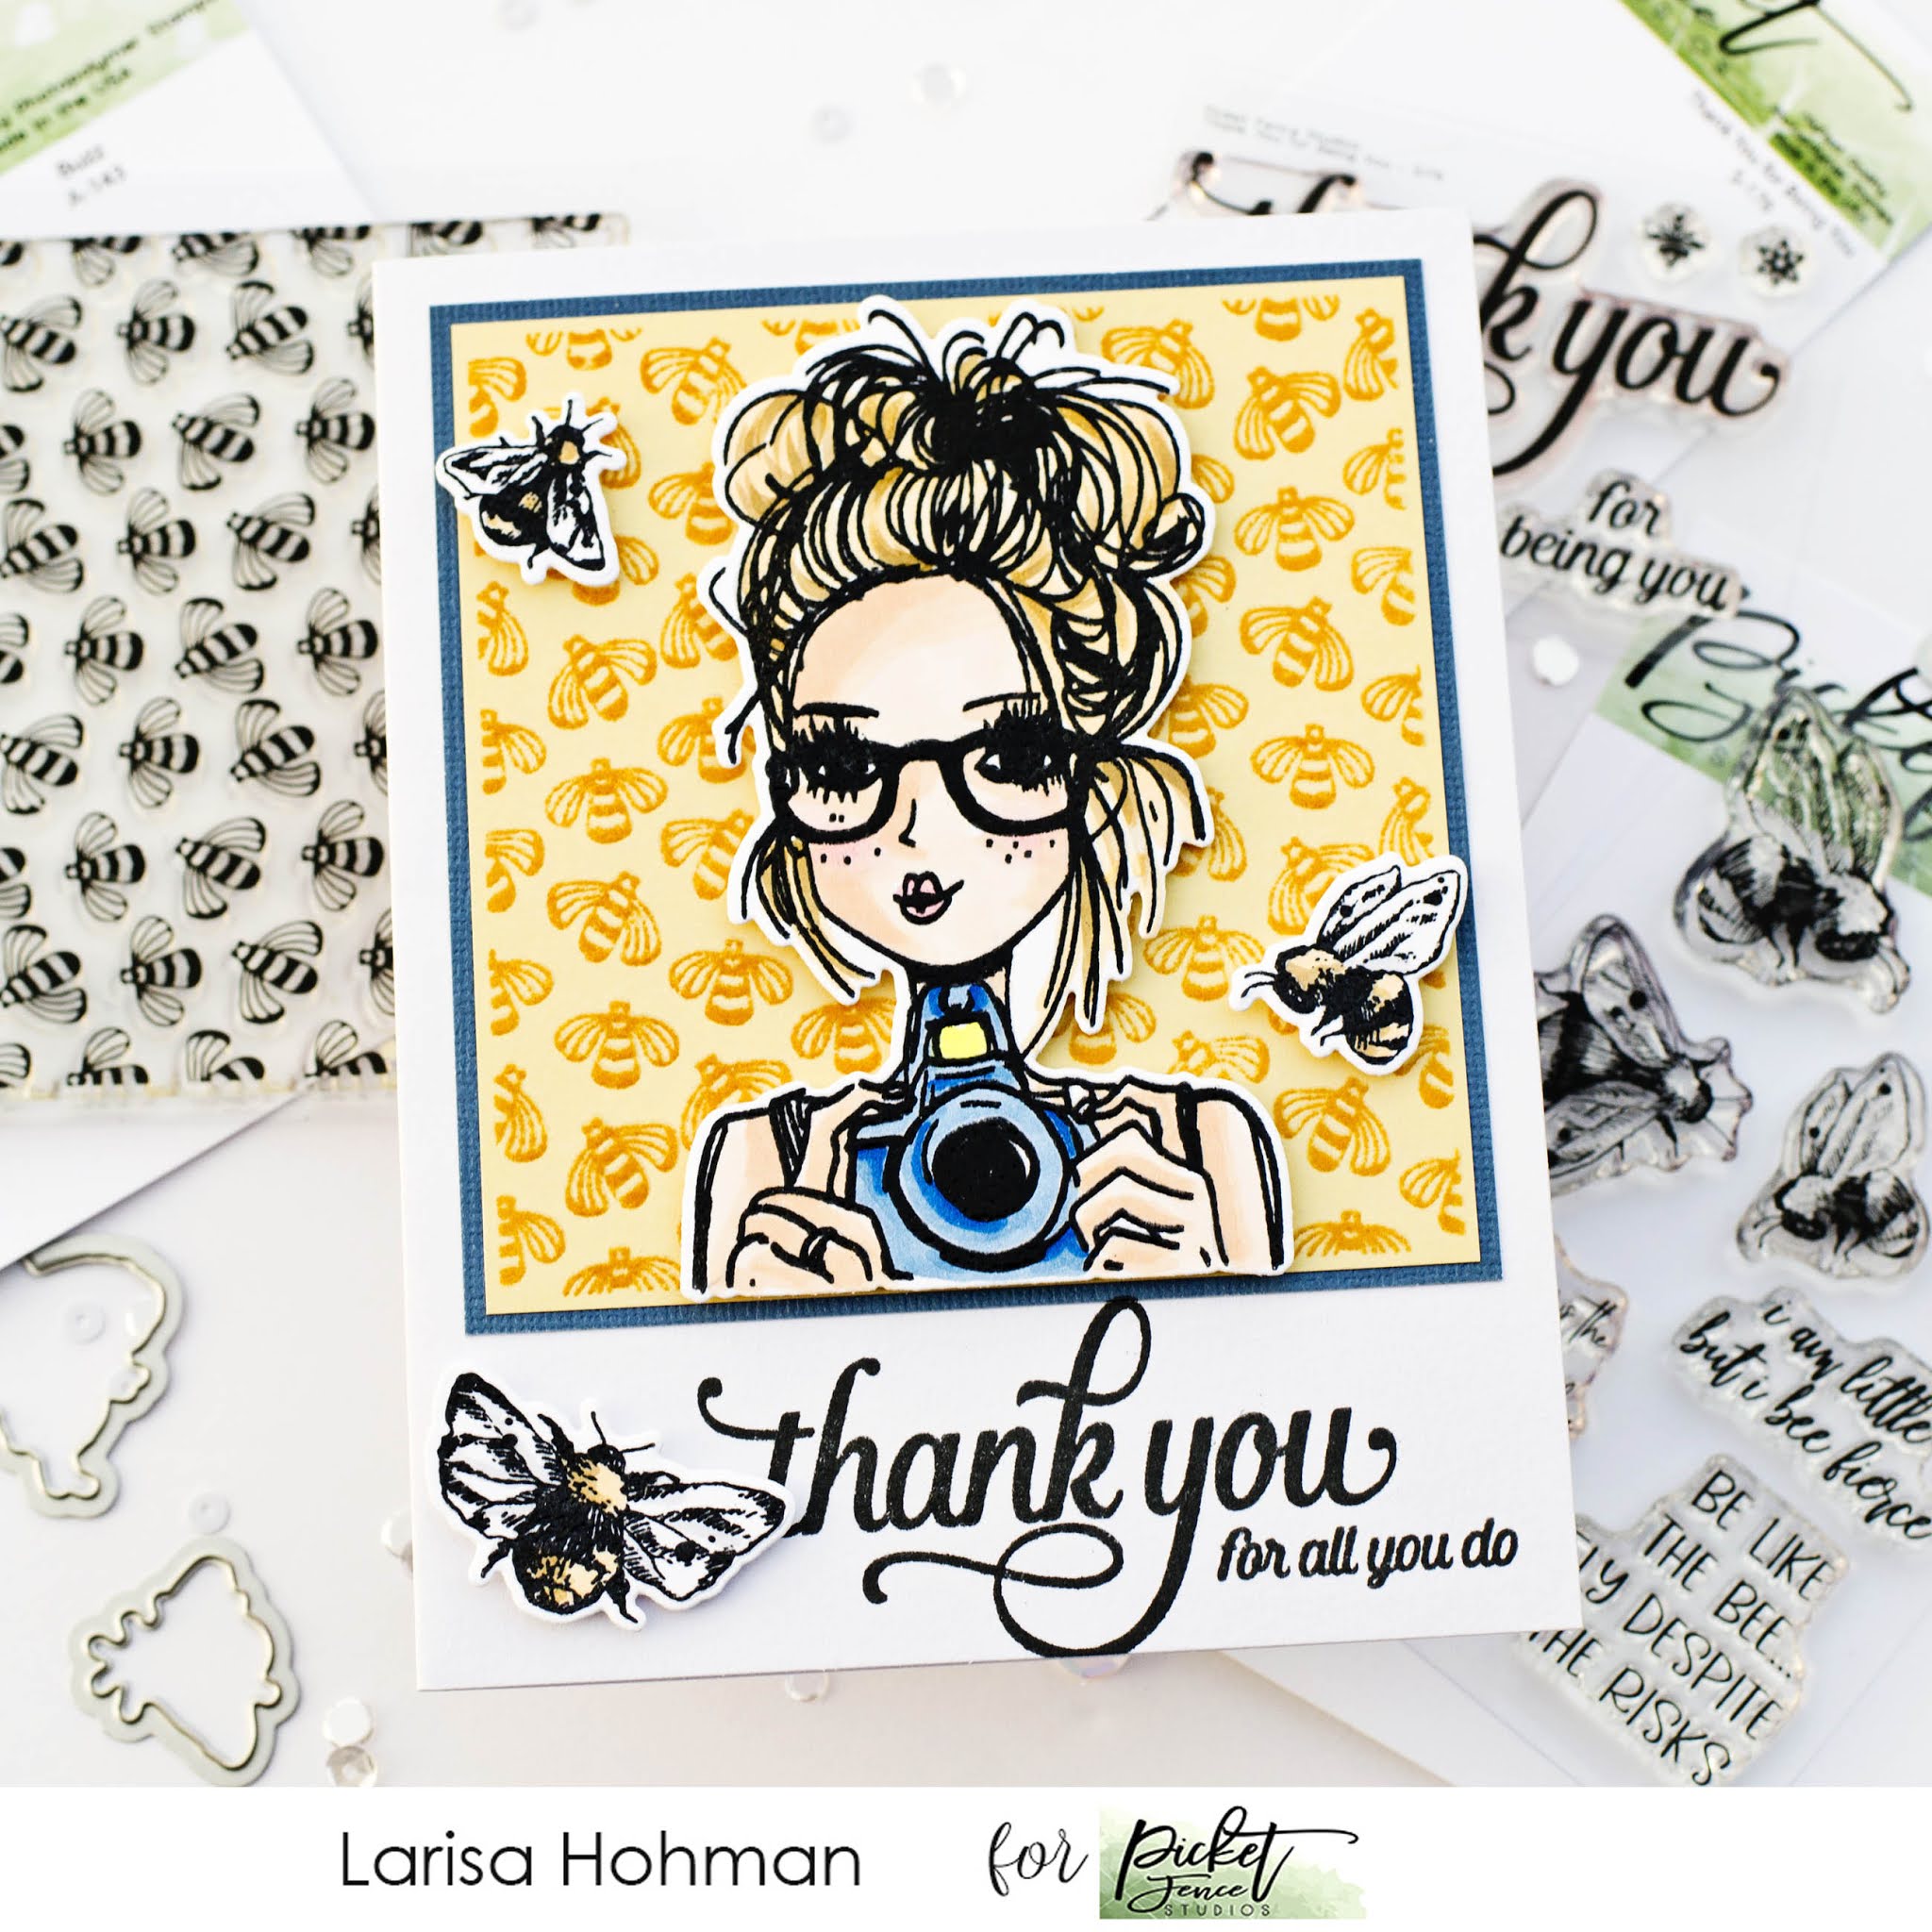
For my next Bee-Themed Card, I used the
NEW Buzz Stamp Set. This seamless stamp is designed so that you can stamp it endless times and it always lines up. However, you can also just stamp it once to create the perfect frame for your card. For this project, I stamped it out on some light yellow card stock using some darker yellow ink from my stash. Then I heat embossed it using clear embossing powder. It really made the image pop and I like it so much, I decided to emboss my girl image and bees too! I stamped them both out with
Hybrid Black Ink and then embossed them with clear embossing powder. I did some very simple Copic Coloring, cut them out with the coordinating dies and popped them on top with some foam tape. Then I used the
NEW Thank You For Being You set again and stamped my sentiment just under my bee frame.

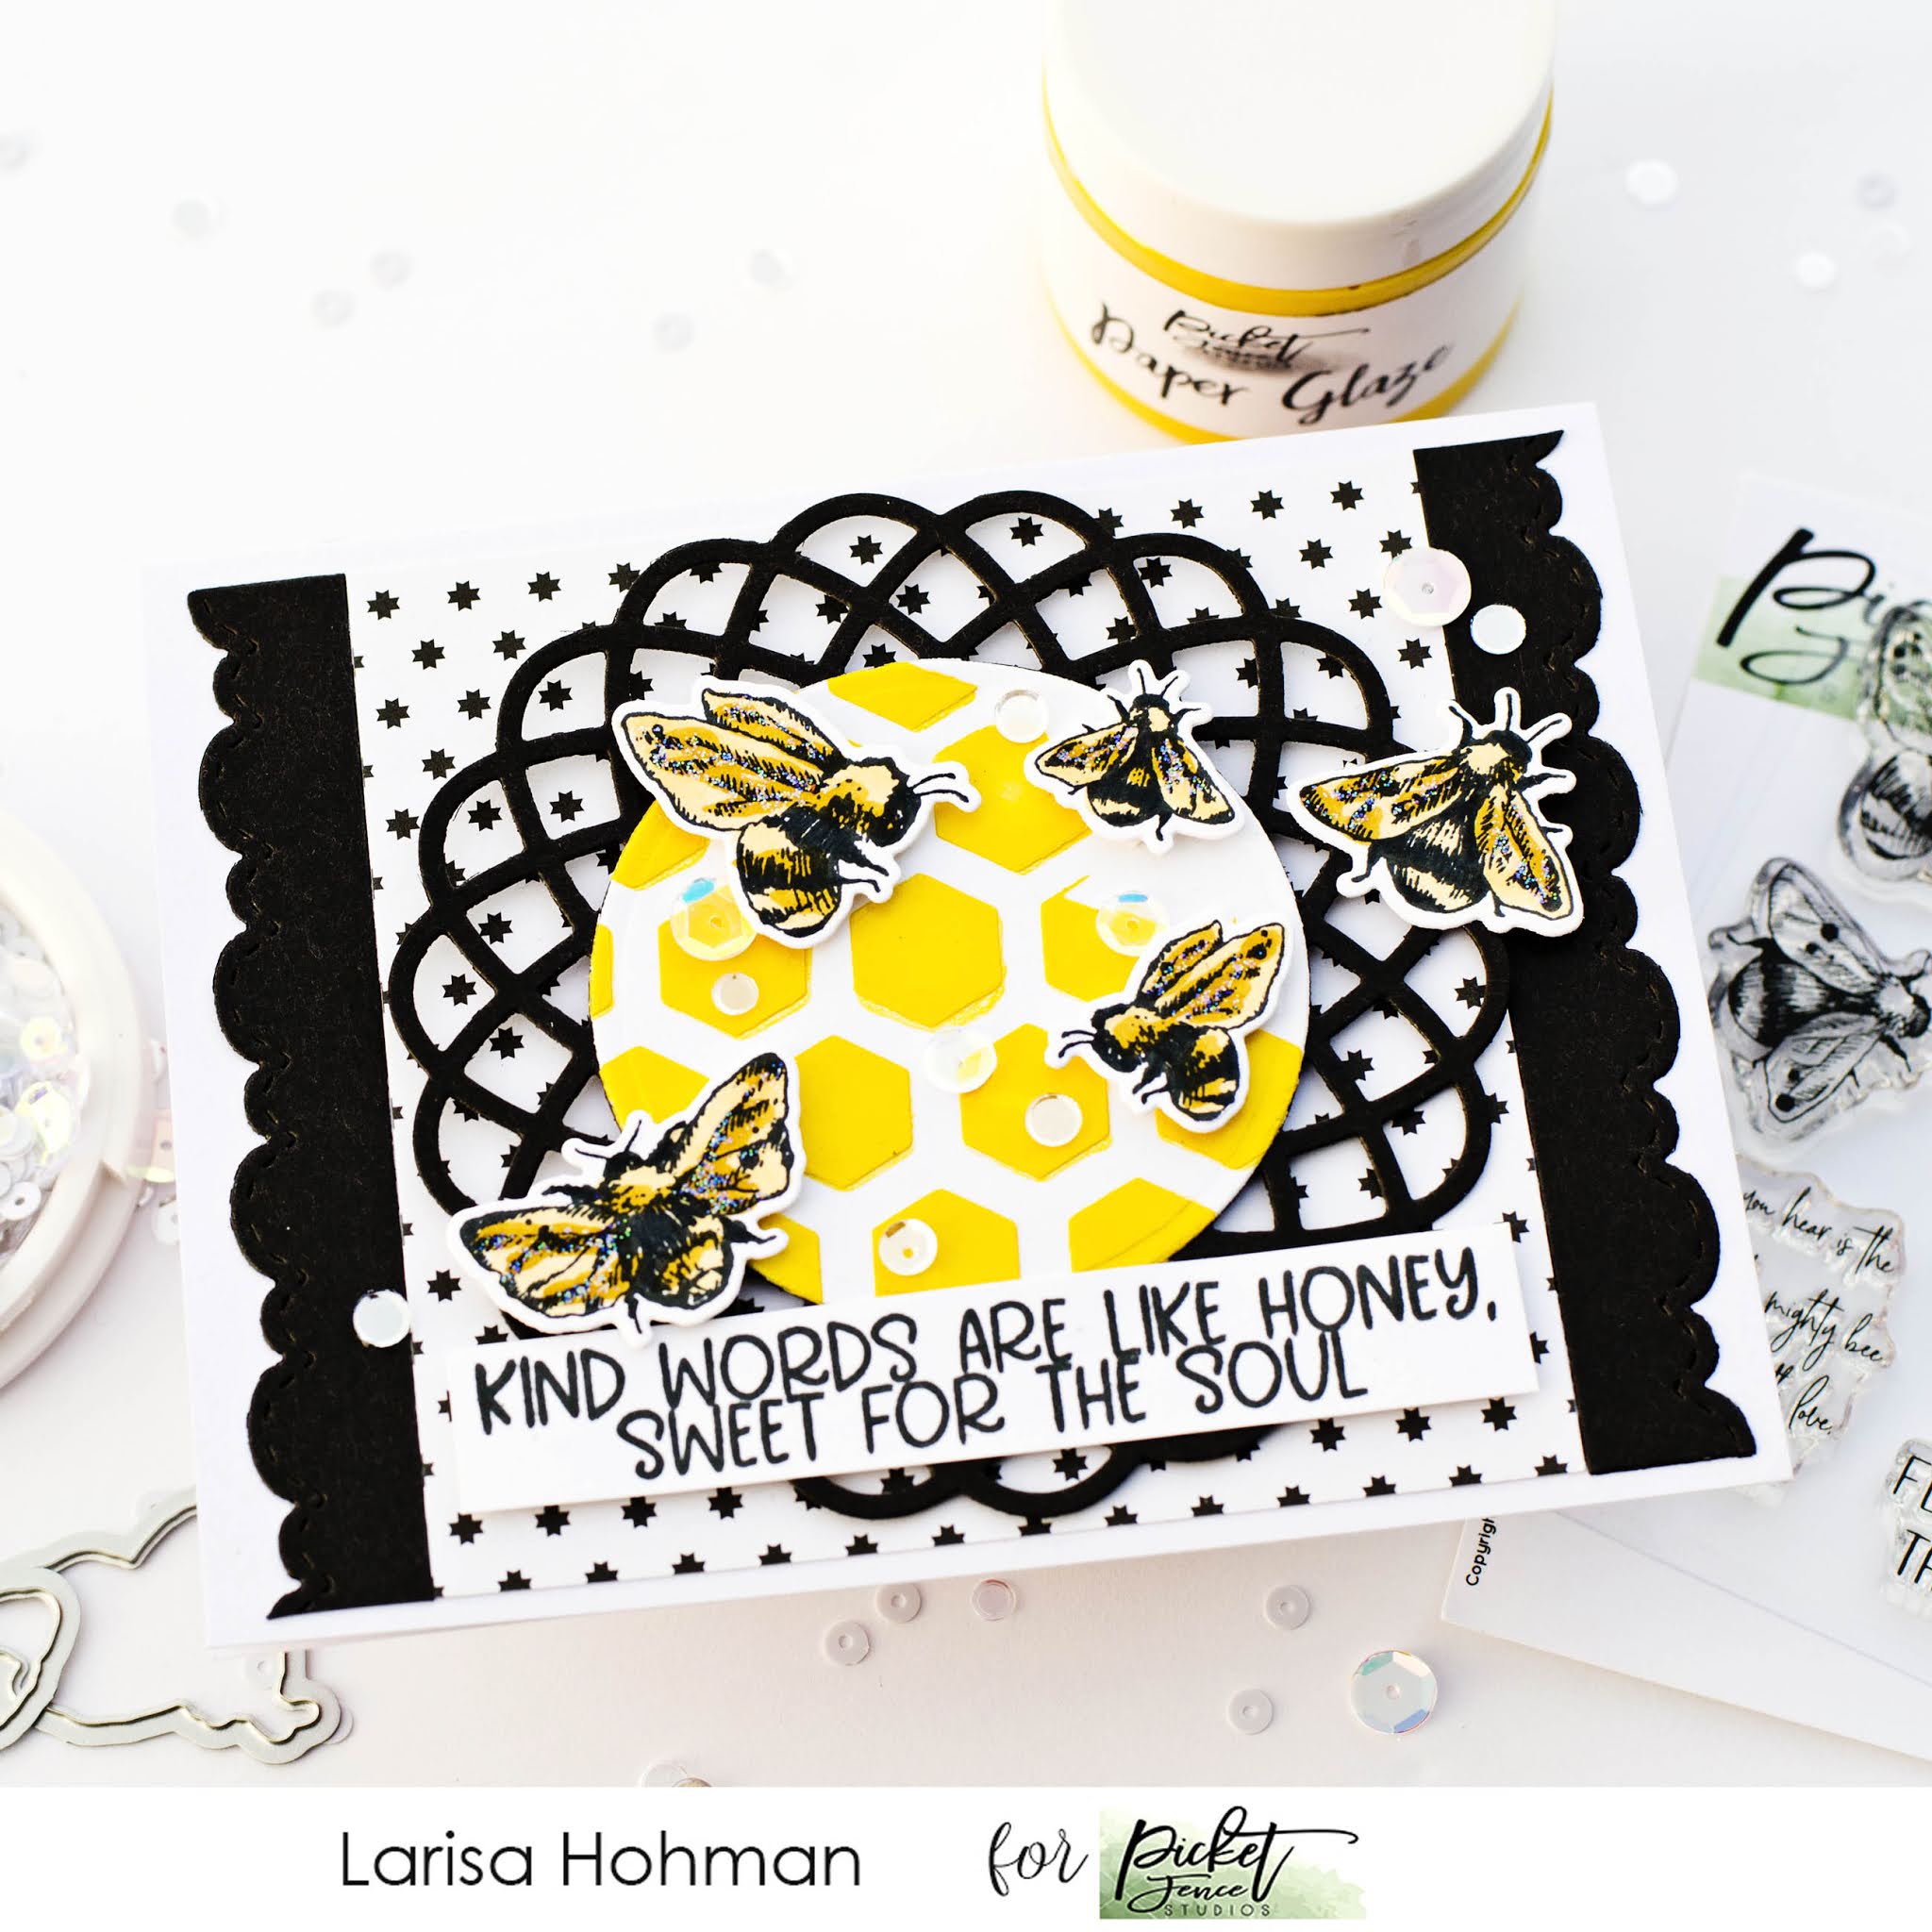
For my final Bee Card, I used the
NEW I Bee Fierce Clear Stamp Set and
Coordinating Dies. To begin, I stared with some simple black and white patterned paper and trimmed it into a rectangle. Then I anchored each side with a strip of black card stock die cut into scalloped trim. I also die cut a large flower from the back card stock and adhered that to the center of the panel. Then, I used my
Daffodil Paper Glaze to create a fun little background with the
NEW Honeycomb Stencil. After it was dry, I die cut it into a circle and popped it onto my black flower shape using foam tape. I stamped, colored, and die cut my bees. Then I randomly placed them about the card and added some with foam tape for dimension. A sweet sentiment and some pretty
Gin and Tonic Sequins finish this card off.
Thank you so much for joining be today! Be sure to stop by the
Picket Fence Studios Shop to check out all the new goodies! You are going to love them!
Products Used:


Such beautiful cards! So cute! 💜
These all look so “different”. I needed some inspiration to get out of my rut. The backgrounds are so cool…I love to stencil, but do sort of the same things over and over. THANK YOU FOR SOME NEW IDEAS. I am going to go look at them again…